
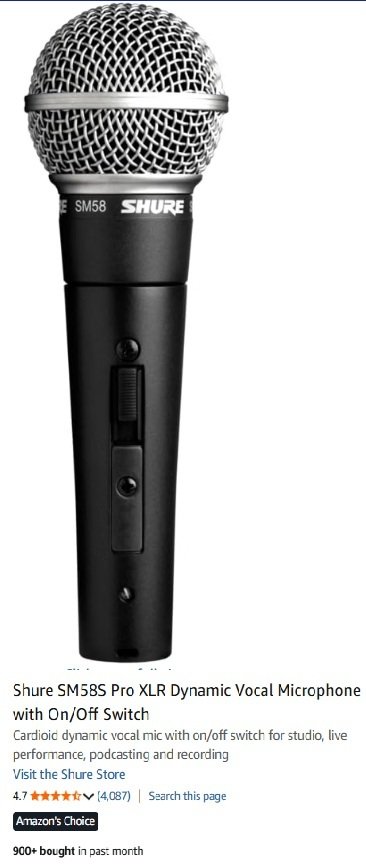
You do not need an expensive commercial studio to begin recording professional voice-overs. With a quiet room, a suitable microphone, dependable headphones, and basic recording software, you can create a practical voice-over studio inside your home.
This beginner’s guide explains the essential equipment you need, what each item does, and how to avoid spending money on products that will not improve your recordings.
Choose Your Recording Space Before Buying Equipment
The room in which you record can affect your sound more than the price of your microphone. An expensive microphone placed in a noisy, echo-filled room may produce worse results than an affordable microphone used in a quiet, properly treated space.
Choose a small area away from traffic, televisions, appliances, plumbing, heating systems, and computer fans. Walk-in closets often work well because clothing absorbs sound reflections. Bedrooms can also be suitable when they contain carpeting, curtains, bedding, and upholstered furniture.
Listen for these common recording problems:
- Echoes or a hollow sound
- Heating and cooling noise
- Computer fan noise
- Traffic, airplanes, and lawn equipment
- Dogs, birds, and other household sounds
- Electrical hum
- Floor vibrations and footsteps
Record a short test with the equipment you already have. Listen through headphones and identify the noises that must be reduced before purchasing additional gear.
1. A Suitable Voice-Over Microphone
The microphone is the central piece of a home voice-over studio. It converts your voice into an electrical or digital signal that can be recorded on your computer.
Beginners usually choose between a condenser microphone and a dynamic microphone. Each type has advantages, depending on the recording environment.
Condenser microphones
Condenser microphones are sensitive and can capture detailed vocal performances. They are commonly used for narration, commercials, audiobooks, and other studio recordings.
However, their sensitivity can also capture room echoes, traffic, computer fans, and other unwanted sounds. A condenser microphone generally works best in a quiet, acoustically treated recording area.
Dynamic microphones
Dynamic microphones are often less sensitive to distant room noise. They may be helpful for beginners recording in bedrooms, offices, or other spaces that are not fully treated.
Some dynamic microphones require more amplification than condenser microphones. If you choose an XLR dynamic microphone, make sure your audio interface can supply enough clean gain.
Which microphone is best for a beginner?
Select a microphone based on your voice, room, connection needs, and budget. Do not assume that the most expensive model will automatically sound best. Whenever possible, listen to spoken-word tests recorded in rooms similar to yours.
2. USB or XLR: Which Microphone Connection Should You Choose?
Both USB and XLR microphones can be used to begin a home voice-over career. The best choice depends on whether you want maximum simplicity or greater flexibility.
USB microphone
A USB microphone connects directly to a computer. It contains the necessary conversion equipment inside the microphone, making it convenient for beginners.
Advantages of a USB microphone:
- Simple connection and setup
- No separate audio interface required
- Fewer cables and pieces of equipment
- Convenient for travel or limited spaces
- Often more affordable as a complete starter system
Possible disadvantages:
- Fewer upgrade options
- The microphone and converter are combined in one device
- Some models provide limited monitoring controls
XLR microphone
An XLR microphone uses a professional three-pin cable and connects to an audio interface. This arrangement provides greater flexibility because the microphone and interface can be upgraded separately.
Advantages of an XLR microphone:
- More microphone and equipment choices
- Easier to upgrade individual components
- Physical gain controls on many audio interfaces
- Suitable for more advanced studio setups
Possible disadvantages:
- Requires an audio interface and XLR cable
- Has more parts to configure
- May cost more than a simple USB setup
A USB microphone can be a practical first purchase for someone who wants a simple setup. An XLR system may be the better choice if you expect to upgrade your studio over time.
3. An Audio Interface for XLR Microphones
An audio interface connects an XLR microphone to your computer. It amplifies the microphone signal and converts it into digital audio.
A beginner working alone usually needs only one microphone input. Purchasing an interface with many inputs is unnecessary unless you plan to record interviews, music, or multiple speakers.
Look for these audio-interface features:
- At least one XLR microphone input
- A clean microphone preamplifier
- A headphone output with volume control
- Direct monitoring
- Phantom power for condenser microphones
- Compatibility with your computer and operating system
- Reliable manufacturer support and current drivers
Direct monitoring lets you hear your voice through the interface without a distracting delay. This is especially useful when checking microphone technique and recording levels.
4. Closed-Back Studio Headphones
Closed-back headphones help you monitor recordings without allowing sound to leak into the microphone. They also make it easier to hear background noise, clicks, distortion, mouth sounds, and editing mistakes.
Choose headphones that are comfortable enough for longer recording and editing sessions. A reasonably neutral sound is more useful than exaggerated bass because you need to evaluate the recording accurately.
Why ordinary speakers are not enough
Computer speakers may hide subtle noise and audio problems. Speakers also cannot be used while recording because their sound may enter the microphone. Headphones allow you to inspect the audio more carefully.
Avoid recording while monitoring at extremely high volume. Moderate listening levels are more comfortable and can help protect your hearing.
5. Essential Microphone Accessories
A few inexpensive accessories can make your recording sessions easier and improve the consistency of your voice-over audio.
Pop filter
A pop filter sits between your mouth and the microphone. It reduces strong bursts of air produced by words containing letters such as P and B. These bursts can create distracting low-frequency thumps in a recording.
Microphone stand or boom arm
A stable stand keeps the microphone in the correct position and prevents handling noise. A desktop stand is compact, while a boom arm can provide more adjustment and free additional desk space.
Shock mount
A shock mount suspends the microphone and reduces vibrations transmitted through the floor, desk, or microphone stand. This can help when a recording space is affected by footsteps, desk movement, or equipment vibration.
XLR cable
If you use an XLR microphone, purchase a dependable cable of an appropriate length. Avoid excessively long cables in a small studio because they can create unnecessary clutter.
Music stand or script holder
A script holder keeps your copy near eye level and reduces head movement. If you read from paper, arrange the pages so you do not need to turn them during a take. A quiet tablet can also be used when it does not introduce fan or handling noise.
6. Acoustic Treatment for Cleaner Voice-Over Audio
Acoustic treatment reduces echoes and reflections inside a room. It is different from soundproofing, which attempts to block sounds traveling into or out of the space.
Foam panels can reduce some higher-frequency reflections, but a few small squares placed randomly on the wall will not solve every acoustic problem. Thick, soft materials positioned around the microphone and speaking area are often more effective.
Affordable sound-treatment options include:
- Moving blankets
- Thick curtains
- Area rugs
- Closet clothing
- Upholstered furniture
- Purpose-built acoustic panels
- Portable recording booths
Place treatment behind and around the speaking position to reduce reflections reaching the microphone. Leave enough space for comfortable movement and safe ventilation.
Avoid very small, untreated enclosures
Recording inside a bare box or cramped enclosure can produce a hollow, nasal, or muffled sound. The goal is not simply to surround the microphone. You must absorb reflections without making the space uncomfortable or unsafe.
7. Voice-Over Recording and Editing Software
A digital audio workstation, often called a DAW, allows you to record, edit, process, and export audio. Beginners do not need complicated software with hundreds of music-production features.
Your recording software should allow you to:
- Select the correct microphone or audio interface
- Record a single voice track
- View the audio waveform
- Cut mistakes and long pauses
- Adjust volume levels
- Apply light processing when necessary
- Export WAV, MP3, or other requested formats
Learn the basic keyboard shortcuts for recording, stopping, selecting, cutting, and saving. A simple and repeatable editing process will save time when you begin working with clients.
Use noise reduction carefully. Excessive processing can create metallic or watery artifacts. Improving the original recording environment is usually better than trying to repair severe noise afterward.
8. Computer, Storage, and Backup Equipment
Most modern computers can handle basic spoken-word recording. Voice-over files generally require fewer resources than large video or music projects.
Your computer should have a compatible USB connection, adequate storage, and enough memory to run your recording software smoothly. A noisy cooling fan can be a problem, so position the computer away from the microphone when possible.
Protect your voice-over files
Keep at least one backup of important recordings. Store original sessions, edited files, final deliveries, scripts, and client instructions in clearly labeled folders.
A simple folder structure might include:
- Client name
- Project name
- Original recordings
- Edited audio
- Final files
- Scripts and instructions
Backups can be stored on an external drive or a secure cloud service. Confirm that sensitive client material is handled according to any privacy or confidentiality requirements.
A Simple Beginner Home Voice-Over Studio Setup
A practical beginner setup does not need to be complicated. Focus first on clean audio and dependable performance.
Basic USB setup
- Quiet, acoustically treated recording area
- USB microphone
- Pop filter
- Stable microphone stand
- Closed-back headphones
- Computer
- Recording and editing software
Basic XLR setup
- Quiet, acoustically treated recording area
- XLR microphone
- Audio interface
- XLR cable
- Pop filter
- Microphone stand or boom arm
- Closed-back headphones
- Computer
- Recording and editing software
How to Position Your Voice-Over Microphone
Begin by placing the microphone approximately six to twelve inches from your mouth. The ideal distance will vary according to the microphone, your voice, and your speaking volume.
Position the microphone slightly to one side and speak across it instead of sending every breath directly into the capsule. Use the pop filter to help maintain a consistent distance.
Stand or sit with good posture and avoid changing your position during a take. Small movements can cause noticeable changes in volume and tone.
Record several tests before beginning an important project. Listen for distortion, room echo, background noise, breath sounds, and changes in volume.
Equipment You May Not Need Immediately
Beginners sometimes spend too much money before learning what their studios actually require. You may not initially need:
- A large mixing console
- Multiple microphones
- Expensive studio speakers
- Numerous audio plug-ins
- A multi-input audio interface
- Elaborate studio furniture
- A custom-built vocal booth
Begin with the essential equipment, practice using it, and identify actual problems before upgrading. Spend money where it creates a clear improvement in recording quality or efficiency.
Common Home Studio Equipment Mistakes
- Buying a sensitive microphone for a noisy, untreated room
- Assuming a higher price always produces better voice-over audio
- Placing the microphone directly beside a computer fan
- Recording too close to the microphone
- Setting the recording level too high and creating distortion
- Ignoring room echo
- Using speakers instead of headphones to inspect recordings
- Applying too much noise reduction or compression
- Failing to save backup copies
- Upgrading equipment before improving performance skills
Frequently Asked Questions
What equipment do I need to start voice-over work from home?
At minimum, you need a quiet recording space, a suitable microphone, headphones, a computer, and recording software. XLR microphones also require an audio interface and cable.
Is a USB microphone good enough for professional voice-over work?
A good USB microphone can produce usable voice-over recordings when it is paired with proper microphone technique and a quiet, treated room. Client requirements and project type should guide your eventual upgrades.
Should a beginner choose a condenser or dynamic microphone?
A condenser microphone can capture detailed vocals in a quiet, treated space. A dynamic microphone may reject more distant room noise and can work well in less controlled environments. Test both types when possible.
Do I need a soundproof booth?
Not necessarily. Many beginners create good recordings in treated closets or quiet rooms. If outside noise remains a serious problem, additional isolation or a purpose-built booth may eventually be helpful.
Can I record voice-overs on a smartphone?
A smartphone can be useful for practicing and testing scripts. However, paid client projects usually require more control over recording quality, microphone placement, editing, file formats, and background noise.
What audio format should I send to clients?
Send the exact file type and specifications requested by the client. WAV files are commonly used for high-quality uncompressed audio, while MP3 files are smaller and easier to distribute. Confirm the required sample rate, bit depth, and naming format before delivery.
Build Your Home Voice-Over Studio One Step at a Time
The best beginner voice-over studio is not necessarily the most expensive one. It is a quiet, comfortable, and dependable space that allows you to deliver clear audio consistently.
Start by improving your recording environment. Choose a microphone that works well with your room, add dependable headphones and essential accessories, and learn how to use your recording software.
As your voice-over skills and client list grow, you can upgrade individual parts of your studio. Careful equipment choices will help you produce professional recordings without spending more than necessary.
VoiceOvers Home Related Articles
- 10 Voice-Over Jobs You Can Do From Home
- AI Voices vs. Human Voice Actors: Which Is Better?
- Best Home Voice-Over Studio Equipment for Beginners
- How Much Can You Earn as a Freelance Voice-Over
- How to Create a Professional Voice-Over Demo That Gets Attention
- How to Market Your Voice-Over Services and Attract Clients
- How to Soundproof a Home Voice-Over Studio on a Budget
- How to Start a Voice-Over Career From Home | Beginner’s Guide
- Voice Acting Techniques for Clear and Engaging Narration
- Where to Find Legitimate Voice-Over Work Online