
A quiet recording space is one of the most important parts of a home voice-over studio. Even an expensive microphone cannot produce professional results when recordings contain traffic, barking dogs, loud appliances, or noticeable room echo.
Complete soundproofing can be expensive because it often requires structural construction. Fortunately, beginners can make significant improvements by choosing the right room, sealing obvious air gaps, controlling vibrations, and adding affordable acoustic treatment.
Understand Soundproofing and Acoustic Treatment
Soundproofing and acoustic treatment solve different problems. Understanding the difference can prevent you from wasting money.
What is soundproofing?
Soundproofing reduces the amount of sound traveling into or out of a room. Effective soundproofing generally requires a combination of mass, airtight seals, structural separation, and vibration control.
Soundproofing helps reduce noises such as:
- Traffic and airplanes
- Neighbors and conversations
- Barking dogs
- Televisions and music
- Heating and cooling systems
- Footsteps and building vibrations
What is acoustic treatment?
Acoustic treatment controls sound reflections inside the recording space. It reduces echoes, hollow tones, and the boxy sound created when your voice bounces between hard surfaces.
Foam panels, thick blankets, curtains, rugs, upholstered furniture, and acoustic panels can improve room acoustics. However, these materials do not provide complete soundproofing.
Begin With the Quietest Room in Your Home
Room selection is the most affordable soundproofing decision you can make. Choosing a naturally quiet location may save hundreds or thousands of dollars in later improvements.
Look for a space that:
- Is away from busy streets
- Does not share a wall with a television or laundry room
- Has few or no windows
- Is not directly below a noisy room
- Contains carpeting, curtains, or soft furniture
- Is far from heating systems and large appliances
- Has a solid door that closes securely
A small bedroom, interior office, pantry, or walk-in closet may work well. Closets filled with clothing often provide useful sound absorption, although ventilation and comfort must still be considered.
Test the Room Before Buying Materials
Stand in the proposed recording area and remain silent for at least one minute. Listen for constant noises, occasional sounds, and vibrations.
Next, clap your hands once and listen for ringing, fluttering, or a hollow echo. Record a short spoken passage and review it through closed-back headphones.
Listen for:
- Room echo
- Low-frequency traffic noise
- Electrical hum
- Computer fans
- Air-conditioning noise
- Plumbing
- Footsteps
- Outdoor equipment
Identify the largest problem first. There is no value in covering every wall with foam if the main difficulty is traffic entering through an open window gap.
Seal Gaps Around the Door
Sound travels easily through air gaps. The space around a lightweight interior door can allow voices, television sounds, and household noise to enter the recording area.
Apply removable or permanent weatherstripping around the door frame. Add a door sweep or draft stopper along the bottom. Close the door and inspect the edges for visible light, which may reveal untreated gaps.
A solid-core door generally blocks more sound than a hollow interior door. Replacing a door can be costly, so begin with weatherstripping and a door sweep before considering a larger improvement.
If you rent your home, choose removable products and obtain permission before making permanent alterations.
Reduce Sound Entering Through Windows
Windows are often one of the weakest parts of a recording room. They can transmit traffic, wind, voices, lawn equipment, and other outdoor sounds.
Affordable improvements include:
- Closing and locking the window securely
- Applying weatherstripping around movable sections
- Hanging thick curtains
- Placing a removable sound-absorbing panel over the window
- Recording when outdoor activity is lowest
A removable window insert can combine a rigid backing with dense, sound-absorbing material. It should fit securely without damaging the window and must be removed when the room needs light, ventilation, or emergency access.
Never permanently block a required emergency exit. Follow local building and fire-safety requirements.
Use Moving Blankets for Affordable Acoustic Treatment
Thick moving blankets are a popular budget option for reducing reflections. They can be hung from portable stands, clothing racks, wall hooks, or curtain rods.
Place the blankets around the speaking position rather than scattering them randomly. Treatment behind the narrator and behind the microphone can help reduce reflections reaching the microphone.
Leave a small air gap between a blanket and the wall when possible. This can improve absorption compared with attaching the blanket completely flat.
Avoid placing blankets directly against hot equipment, heaters, lamps, electrical panels, or exposed wiring. Do not use arrangements that block ventilation or create a tripping hazard.
Add Rugs and Floor Padding
Hard flooring reflects sound and can make a recording feel bright or hollow. An area rug can reduce reflections from wood, laminate, tile, or concrete floors.
A thick rug pad can provide additional absorption and may reduce some vibration traveling through the floor. Place it beneath the microphone, narrator, and nearby stands.
Floor treatment will not completely block footsteps from another floor or room. Serious vibration problems may require structural changes or a different recording location.
Use Curtains and Soft Furnishings
Thick curtains can reduce reflections from windows and bare walls. Upholstered chairs, fabric-covered furniture, bookcases, and other irregular surfaces can also help control the sound of a room.
Household materials work best when they are thick, soft, and placed near important reflection points. A thin decorative curtain will have less effect than a heavy curtain with folds.
Avoid filling the room so completely that it becomes uncomfortable or difficult to use. The goal is a balanced, controlled sound rather than a cramped space.
Build Simple DIY Acoustic Panels
Purpose-built acoustic panels can provide better absorption than thin foam. A basic panel usually contains sound-absorbing material inside a wooden frame covered with breathable fabric.
When building or purchasing panels:
- Choose materials designed for acoustic use.
- Follow the manufacturer’s handling instructions.
- Wear appropriate protective equipment when required.
- Use breathable covering fabric.
- Secure the panel safely to prevent it from falling.
- Keep materials away from flames and heat sources.
- Check applicable fire-safety requirements.
Do not leave irritating fibers exposed inside the recording space. If you are unsure about safe construction, purchase finished acoustic panels or ask an experienced professional for help.
Do Acoustic Foam Panels Soundproof a Room?
Acoustic foam can reduce higher-frequency reflections and improve the sound inside a recording space. It does not normally block traffic, neighbors, or other loud external noises.
Covering a few small wall areas with thin foam may provide only a limited improvement. Thicker treatment generally absorbs a wider range of frequencies.
Use foam to address room reflections, not as a complete soundproofing solution. Choose products with appropriate safety documentation and install them according to the manufacturer’s directions.
Create a Portable Voice-Over Booth
A portable booth can be useful when you cannot modify the room permanently. One simple design uses clothing racks or sturdy stands arranged around the recording position with thick blankets hung from them.
A portable setup may include:
- Two or more sturdy clothing racks
- Thick moving blankets
- Safe clamps or fasteners
- A rug or padded floor covering
- A stable microphone stand
- A quiet script holder
- A small, quiet light outside the treated area
Arrange the blankets so they absorb nearby reflections without touching the microphone or narrator. Ensure the structure cannot tip or collapse.
A portable booth is primarily acoustic treatment. It may slightly reduce some outside sound, but it will not provide the isolation of a professionally constructed soundproof room.
Turn a Walk-In Closet Into a Recording Space
A walk-in closet filled with clothing can provide a useful starting point because fabric absorbs sound naturally. Position yourself so hard walls and the door do not create strong reflections around the microphone.
Add a rug if the floor is hard. A thick blanket or panel can cover an untreated wall or door.
Do not place the microphone in a tiny, empty closet and expect professional sound. Small untreated spaces can create boxy reflections. Test several positions and listen carefully to the results.
Comfort and ventilation are essential. Do not seal yourself inside an airtight enclosure, block ventilation openings, or remain in a hot recording space for long periods.
Control Computer and Equipment Noise
Computer fans, hard drives, power supplies, and audio equipment can add constant background noise. Place noisy equipment outside the recording area when practical.
A longer monitor, USB, or audio cable may allow the computer to remain on the other side of the treated space. Make sure cables are compatible, secured, and not stretched across walkways.
Do not place a computer inside an enclosed box without proper ventilation. Overheating can damage the equipment and create a safety risk.
Reduce Heating and Air-Conditioning Noise
Heating and cooling systems can produce fan noise, air movement, rattles, and vibrations. When safe and practical, record during short periods when the system is not running.
Bring the room to a comfortable temperature before the session, turn the system off briefly, and record several short sections. Restore ventilation between takes.
Never block vents permanently or interfere with fuel-burning equipment. Contact a qualified professional when a heating, cooling, or ventilation system requires modification.
Choose the Right Microphone for Your Room
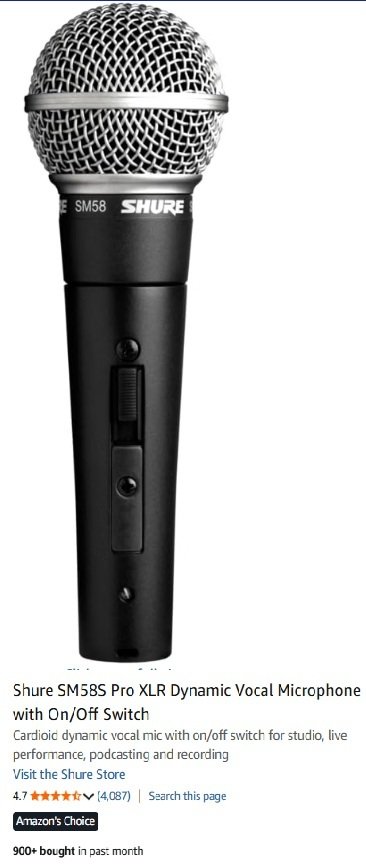
A sensitive condenser microphone can capture detailed vocals, but it may also record more room reflections and distant noises. A dynamic microphone may be easier to use in some untreated or moderately noisy rooms.
Microphone choice does not replace soundproofing, but the right pickup pattern and careful placement can reduce unwanted sound.
Point the least sensitive area of the microphone toward the primary noise source when the microphone’s design allows it. Always speak into the correct side of the microphone.
Improve Microphone Placement
Moving closer to the microphone can increase the level of your voice compared with room noise, but getting too close may create popping, excessive bass, or mouth sounds.
Begin approximately six to twelve inches away and use a pop filter. Speak slightly across the microphone rather than directly into it.
Test different positions within the room. Moving only a few feet may reduce reflections, electrical hum, traffic noise, or computer fan noise.
Schedule Recordings During Quiet Hours
Scheduling is one of the least expensive ways to improve recordings. Observe your home and neighborhood for several days to identify the quietest periods.
Consider:
- Traffic patterns
- School and work schedules
- Garbage collection
- Lawn maintenance
- Air traffic
- Household appliance use
- Neighbor activity
- Heating and cooling cycles
Record demanding projects during the quietest hours and use noisier periods for editing, script preparation, marketing, and administrative work.
A Three-Level Budget Studio Plan
Level 1: Use materials you already own
- Choose the quietest room or closet.
- Record when household activity is lowest.
- Use existing clothing, blankets, rugs, and curtains.
- Move the microphone away from windows and computers.
- Turn off unnecessary appliances during recording.
- Test several microphone positions.
Level 2: Make affordable improvements
- Add weatherstripping around the door.
- Install a door sweep or use a draft stopper.
- Purchase thick moving blankets.
- Add a rug and floor pad.
- Use stands or racks to create a portable treated area.
- Add heavy curtains over windows.
Level 3: Upgrade the most important weaknesses
- Install finished acoustic panels.
- Create a removable window insert.
- Replace a hollow door with a solid-core door when permitted.
- Move noisy equipment outside the recording area.
- Consult an acoustic professional about serious noise problems.
Test Every Change You Make
Do not purchase and install everything at once. Make one improvement, record the same passage, and compare it with your earlier recording.
Keep the microphone, recording level, speaking distance, and script consistent during each test. This makes it easier to determine whether a change actually improved the sound.
Listen through dependable headphones and ordinary speakers. A successful change should reduce unwanted noise or echo without making the voice sound muffled, boxy, or unnatural.
Common Budget Soundproofing Mistakes
- Confusing acoustic foam with complete soundproofing
- Treating every wall before identifying the main noise source
- Ignoring gaps around doors and windows
- Building an enclosure that is too small
- Blocking ventilation or emergency exits
- Placing blankets near heaters or hot equipment
- Using unsafe or unsecured construction materials
- Buying an expensive microphone before improving the room
- Applying excessive noise reduction during editing
- Failing to test improvements with consistent recordings
Frequently Asked Questions
Can you completely soundproof a room cheaply?
Complete soundproofing usually requires construction involving mass, airtight seals, vibration control, and structural separation. Budget improvements can reduce some noise, but they may not block loud traffic, neighbors, or building vibrations completely.
What is the cheapest way to reduce room echo?
Use materials you already own, such as thick blankets, clothing, rugs, curtains, and upholstered furniture. Place them close to the recording position where they can reduce nearby reflections.
Do moving blankets soundproof a room?
Moving blankets mainly absorb reflections inside a room. They may slightly reduce some sound transmission, but they do not provide complete soundproofing.
Is a closet good for voice-over recording?
A walk-in closet filled with clothing can provide useful sound absorption. Test the space carefully because very small closets can create a muffled or boxy sound and may lack comfortable ventilation.
Should I cover every wall with acoustic foam?
Not necessarily. Foam controls reflections but does not block most outside noise. Begin by treating the areas nearest the narrator and microphone, then test the results before purchasing more.
Can software remove background noise?
Software can reduce mild, steady noise, but aggressive processing may create metallic or watery artifacts. Preventing noise during recording usually produces better results than trying to remove it afterward.
Create a Quieter Voice-Over Studio Without Overspending
An affordable home voice-over studio begins with the right room. Choose the quietest available space, identify its greatest weaknesses, and improve one problem at a time.
Seal air gaps, reduce window noise, control computer fans, and schedule recordings during quiet hours. Use blankets, rugs, curtains, clothing, and acoustic panels to reduce reflections around the microphone.
Test every change before spending more money. A carefully selected and properly treated space can often deliver better voice-over recordings than an expensive microphone placed in a noisy, echo-filled room.
VoiceOvers Home Related Articles
- 10 Voice-Over Jobs You Can Do From Home
- AI Voices vs. Human Voice Actors: Which Is Better?
- Best Home Voice-Over Studio Equipment for Beginners
- How Much Can You Earn as a Freelance Voice-Over
- How to Create a Professional Voice-Over Demo That Gets Attention
- How to Market Your Voice-Over Services and Attract Clients
- How to Soundproof a Home Voice-Over Studio on a Budget
- How to Start a Voice-Over Career From Home | Beginner’s Guide
- Voice Acting Techniques for Clear and Engaging Narration
- Where to Find Legitimate Voice-Over Work Online