
Starting a voice-over career from home is more achievable than ever. Businesses, authors, educators, video producers, game developers, and online creators all need voices for their projects. With the right recording space, basic equipment, regular practice, and a professional approach, you can begin building a voice-over business without renting an expensive studio.
What Is Voice-Over Work?
Voice-over work involves recording spoken words for media projects without appearing on camera. A voice actor may explain a product, narrate a story, teach a lesson, introduce a podcast, or bring an animated character to life.
Common types of voice-over projects include:
- Commercials and advertisements
- Audiobooks
- Online courses and educational videos
- Corporate training presentations
- YouTube and social media videos
- Podcasts and introductions
- Animation and video games
- Telephone and voicemail systems
- Documentaries
- Product demonstrations
You do not necessarily need a dramatic announcer voice to succeed. Many clients want voices that sound friendly, believable, conversational, and appropriate for their audiences.
Step 1: Discover Your Natural Voice-Over Style
Begin by listening carefully to your natural speaking voice. Consider whether you sound warm, energetic, calm, authoritative, cheerful, reassuring, youthful, or conversational. Your natural qualities may help determine the projects that suit you best.
Record yourself reading several kinds of material, such as a commercial, audiobook passage, instructional script, and character scene. Listen to each recording and note which style sounds the most comfortable and convincing.
Avoid trying to imitate famous performers. Clients are usually looking for an authentic voice that fits their project. Your individuality can become one of your greatest professional advantages.
Step 2: Practice Essential Voice-Acting Skills
Voice-over work requires more than having a pleasant voice. You must learn how to interpret a script and communicate its meaning naturally. Good voice actors understand pacing, pronunciation, emotion, emphasis, and timing.
Practice these important skills:
- Clear pronunciation: Speak distinctly without sounding stiff or unnatural.
- Breath control: Learn where to breathe so sentences remain smooth.
- Pacing: Adjust your speed to match the subject and audience.
- Emotional delivery: Use an appropriate tone for the message.
- Script interpretation: Identify the purpose of the words before recording.
- Consistency: Maintain the same energy, volume, and vocal character across multiple takes.
Practice for at least 15 to 20 minutes each day. Reading aloud from advertisements, books, product descriptions, and educational material can help you develop flexibility.
Step 3: Create a Quiet Home Recording Space
The room where you record is often more important than the price of your microphone. Hard walls and empty rooms create echoes that make recordings sound distant and unprofessional.
Choose the quietest area of your home. A walk-in closet filled with clothing can work well because the soft materials absorb sound. A small room with carpeting, curtains, blankets, and upholstered furniture can also produce good results.
Reduce common household noises
- Turn off fans, air conditioners, and noisy appliances.
- Close windows and doors before recording.
- Keep the microphone away from computer fans.
- Record during quieter times of the day.
- Use thick blankets or acoustic panels to reduce echoes.
- Place rugs on hard floors when possible.
Sound treatment reduces reflections inside the room. Soundproofing blocks noise from entering or leaving it. Complete soundproofing can be expensive, but beginners can often improve recording quality substantially with simple sound-absorbing materials.
Step 4: Choose Your Voice-Over Equipment
You do not need the most expensive equipment to begin. Purchase dependable beginner equipment and upgrade only after you gain experience and paying clients.
Basic home voice-over equipment
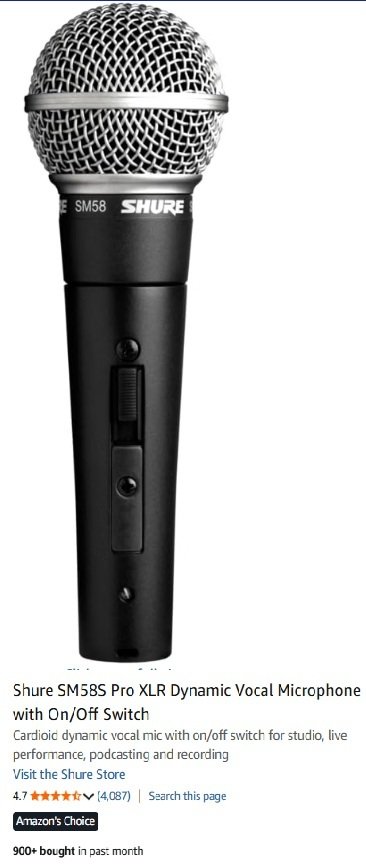
- Microphone: A quality USB microphone offers a simple starting point. An XLR microphone provides additional upgrade options but requires an audio interface.
- Computer: Most modern desktop or laptop computers can run basic recording software.
- Headphones: Closed-back headphones help you hear unwanted noise, mouth sounds, and editing problems.
- Pop filter: This reduces bursts of air produced by letters such as P and B.
- Microphone stand: A stable stand prevents handling noise and helps maintain proper microphone placement.
- Recording software: Audio software allows you to record, edit, and export completed voice-over files.
Position the microphone several inches from your mouth and speak slightly across it instead of directly into it. This can help reduce harsh breath sounds and popping noises.
Step 5: Learn Basic Audio Recording and Editing
Voice actors working from home are often expected to provide clean, properly edited audio. You do not need to become a professional sound engineer, but you should understand basic recording and editing techniques.
Learn how to:
- Set an appropriate recording level
- Remove obvious mistakes and long pauses
- Reduce unwanted background noise carefully
- Control breaths without making the recording sound unnatural
- Export files in the format requested by the client
- Name and organize files correctly
- Save backup copies of every project
Avoid excessive processing. Heavy noise reduction can make a voice sound metallic or artificial. A naturally quiet recording is usually better than attempting to repair a noisy one afterward.
Step 6: Create a Professional Voice-Over Demo
A voice-over demo is a short audio presentation that shows prospective clients what you can do. It should include your strongest performances and reflect the type of work you want to attract.
If you want commercial projects, create a commercial demo featuring several brief advertising styles. If you are interested in audiobooks, prepare narration samples that demonstrate storytelling, pacing, and character differences.
Tips for creating your first demo
- Use short script selections with different tones.
- Begin with your strongest recording.
- Demonstrate variety without forcing unnatural voices.
- Use original or properly licensed scripts.
- Make sure every clip has clean, consistent audio.
- Create separate demos for different voice-over categories.
Your first demo does not have to represent every possible voice-over style. A focused demo often gives clients a clearer understanding of where your voice fits.
Step 7: Build Your Online Voice-Over Presence
Prospective clients need a convenient way to hear your demos and contact you. A simple professional website can introduce your services, showcase your voice, and help your name appear in search results.
Your voice-over website should include:
- A short professional biography
- Your voice-over demos
- A list of services and vocal styles
- Your recording and delivery capabilities
- A contact form or professional email address
- Client testimonials when available
- Clear information about requesting a quote
You can also create profiles on reputable freelance marketplaces, voice-over casting platforms, and professional networking websites. Keep your photograph, biography, and service description consistent across your profiles.
Step 8: Find Your First Voice-Over Clients
New voice actors often find work through a combination of auditions, freelance platforms, networking, and direct marketing. Begin with smaller projects that allow you to develop confidence, experience, and client reviews.
Potential voice-over clients include:
- Video production companies
- Advertising and marketing agencies
- Local businesses
- Independent authors and publishers
- Online course creators
- Podcast producers
- YouTube creators
- Software and technology companies
- Nonprofit organizations
- Game and animation developers
When contacting a potential client, keep your message short and personalized. Explain how your voice could support the client’s projects and include a link to a relevant demo.
Step 9: Set Fair Voice-Over Rates
Voice-over prices can depend on the project’s length, purpose, audience, distribution, editing requirements, and usage period. A recording used internally by one company is different from a commercial broadcast to a large audience.
Before quoting a project, ask:
- How many words are in the script?
- Where will the recording be used?
- How large is the expected audience?
- How long will the client use the recording?
- Does the project require audio editing or file splitting?
- How many revisions are included?
- What is the delivery deadline?
Do not base every price only on the time required to record. The value and reach of the finished recording can also affect an appropriate rate. Clearly describe what your quote includes before beginning the project.
Step 10: Treat Voice-Over Work Like a Business
Reliability is one of the best ways to earn repeat clients. Respond professionally, meet deadlines, follow directions, and keep accurate records of projects and payments.
Ask clients to approve the final script before recording. Establish how revisions will be handled, especially when a client changes the script after delivery. Written terms can prevent confusion and protect both parties.
Back up your audio files and maintain an organized folder for every customer. Keep records of invoices, expenses, contracts, and business correspondence for tax and administrative purposes.
Common Beginner Voice-Over Mistakes
- Buying expensive equipment before treating the recording space
- Reading words without understanding the message
- Trying to sound like a traditional announcer on every project
- Submitting noisy or heavily processed recordings
- Using one demo for every type of voice-over work
- Accepting a project without understanding its usage
- Underpricing work without considering revisions or editing
- Missing deadlines or communicating poorly with clients
- Giving up after a small number of unsuccessful auditions
Can You Really Make Money Doing Voice-Overs From Home?
Yes, it is possible to earn money recording voice-overs from home, but success usually develops gradually. Beginners must improve their skills, create strong samples, audition regularly, and build professional relationships.
Some people use voice-over work to earn occasional extra income, while others develop full-time businesses. Your results will depend on your skill, sound quality, chosen specialty, marketing efforts, availability, and ability to deliver reliable work.
Frequently Asked Questions
Do I need a special voice to become a voice actor?
No. Clients need many different vocal styles, ages, accents, tones, and personalities. Clear communication and believable delivery are often more important than having a traditionally impressive voice.
Can I start voice-over work without professional experience?
Yes. Begin by practicing, learning recording skills, and creating a small collection of strong samples. Entry-level projects can help you gain experience and develop a professional portfolio.
How much does a beginner home studio cost?
Costs vary according to the equipment you already own and the amount of sound treatment your room requires. Start with essential equipment and a quiet space, then upgrade as your income and technical needs grow.
How long does it take to become a successful voice actor?
There is no fixed timeline. Some beginners find small projects quickly, while building steady repeat business can take much longer. Consistent training, auditions, marketing, and dependable service can improve your opportunities.
Can voice-over work be done part-time?
Yes. Many people begin part-time while keeping another source of income. A flexible schedule can help you practice, audition, and complete smaller projects as you develop your business.
Start Building Your Voice-Over Career Today
You do not need a large studio or years of experience to take your first step. Begin by studying your natural voice, practicing every day, and improving the sound quality of one quiet room in your home.
Create a focused demo, establish a professional online presence, and look for projects that match your current abilities. Every recording gives you an opportunity to improve. With patience, consistent effort, and good client service, your home voice-over setup can grow into a rewarding freelance business.
VoiceOvers Home Related Articles
- 10 Voice-Over Jobs You Can Do From Home
- AI Voices vs. Human Voice Actors: Which Is Better?
- Best Home Voice-Over Studio Equipment for Beginners
- How Much Can You Earn as a Freelance Voice-Over
- How to Create a Professional Voice-Over Demo That Gets Attention
- How to Market Your Voice-Over Services and Attract Clients
- How to Soundproof a Home Voice-Over Studio on a Budget
- How to Start a Voice-Over Career From Home | Beginner’s Guide
- Voice Acting Techniques for Clear and Engaging Narration
- Where to Find Legitimate Voice-Over Work Online